Skip to content

Press Release: Stratodesk and ThinClient Direct Partner to Redefine Cloud Workspace Endpoints — Learn more

How to Import Stratodesk Virtual Appliance into Nutanix AHV

Nutanix AHV

In this article from Stratodesk Sales Engineer, Paul Craddock, learn how to import Stratodesk Virtual Appliance into Nutanix AHV.

In this guide, walk through the entire process of importing Stratodesk NoTouch Center Virtual Appliance into Nutanix AHV using Prism. For the purpose of this test, we used Nutanix Acropolis Hypervisor (AHV) AOS-5.10.1 LTS.

Firstly, you will need to download the latest version of NoTouch Center vhd file for Hyper-V environments.

Please note that the image service supports raw, vhd, vmdk, iso, and qcow2 disk formats.

Uploading the Disk Image

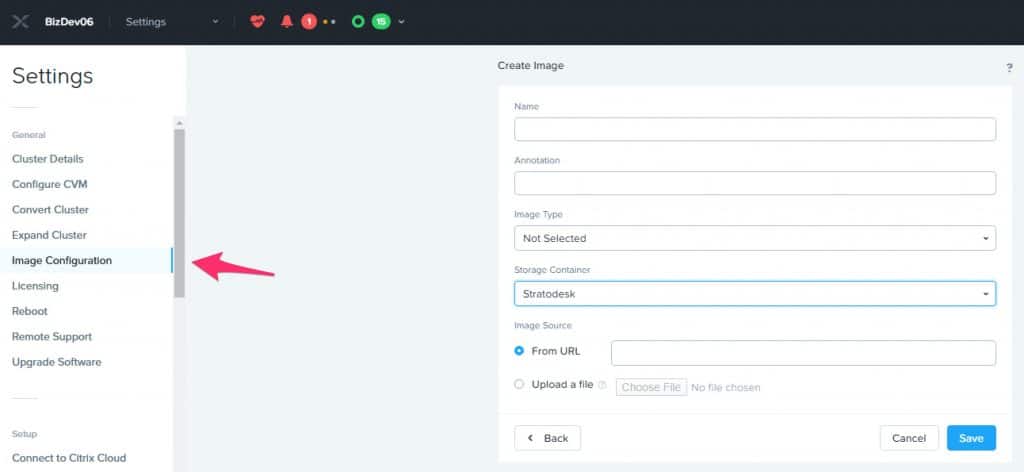
  1. To start the process, we need to upload the vhd file via Image Configuration.
  2. On the next screen we need to specify the following: Image Name (the “annotation” field is optional). Image Type should be “disk”
  3. Choose the correct storage container
  4. Then choose “Upload a File” for the Image Source option.
  5. Click on “Choose File” and browse to your vhd or other format disk image
  6. Next click save.

7. After uploading the image, it will briefly show as ‘Inactive’ please be patient with this process as the image service is converting this for future use. Once this is complete it will show as ‘Active’ and should only take a couple of minutes even for large vhd’s.


Creating the Virtual Machine

  1. Next we need to create a virtual machine from the Image Service disk we created earlier.
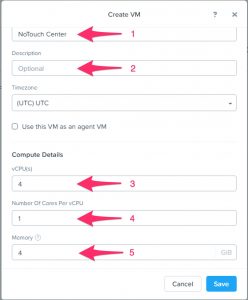
  2. Name – Enter the name of the Virtual Machine
  3. Description – Optional, enter a description to identify the Virtual Machine
  4. vCPU(s) – Enter the number of vCPU’s that you’d like for the Virtual Machine. Typically the default setting here is 4vCPU.
  5. Number of Cores per vCPU – Typically this is set to “1”
  6. Memory – Enter the amount of RAM to assign to the Virtual Machine in GB format. Again typically this is set to 4GB for larger deployments you might want to consider increasing this.Nutanix AHV
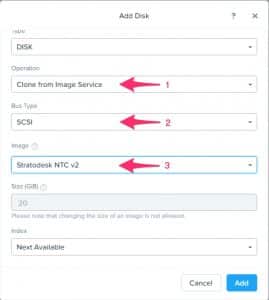
  7. Next we need to add the vDisk, so select ‘Add New Disk’.
  8. In the ‘Add Disk’ screen, choose ‘Clone from Image Service’.
  9. Bus Type should be SCSI for most modern operating systems
  10. Choose the virtual appliance disk that you created earlier

Nutanix AHV

Don’t worry about the disk size as that will filled in automatically, then click on the ‘Add’ button.

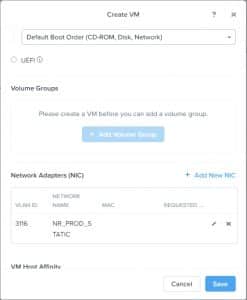
Finally, under ‘Network Adapters (NIC)’, choose the button ‘Add New NIC’. On this screen, choose the correct VLAN and select it.

Nutanix AHV

The final step is the save the virtual machine.

Powering on the Virtual Appliance

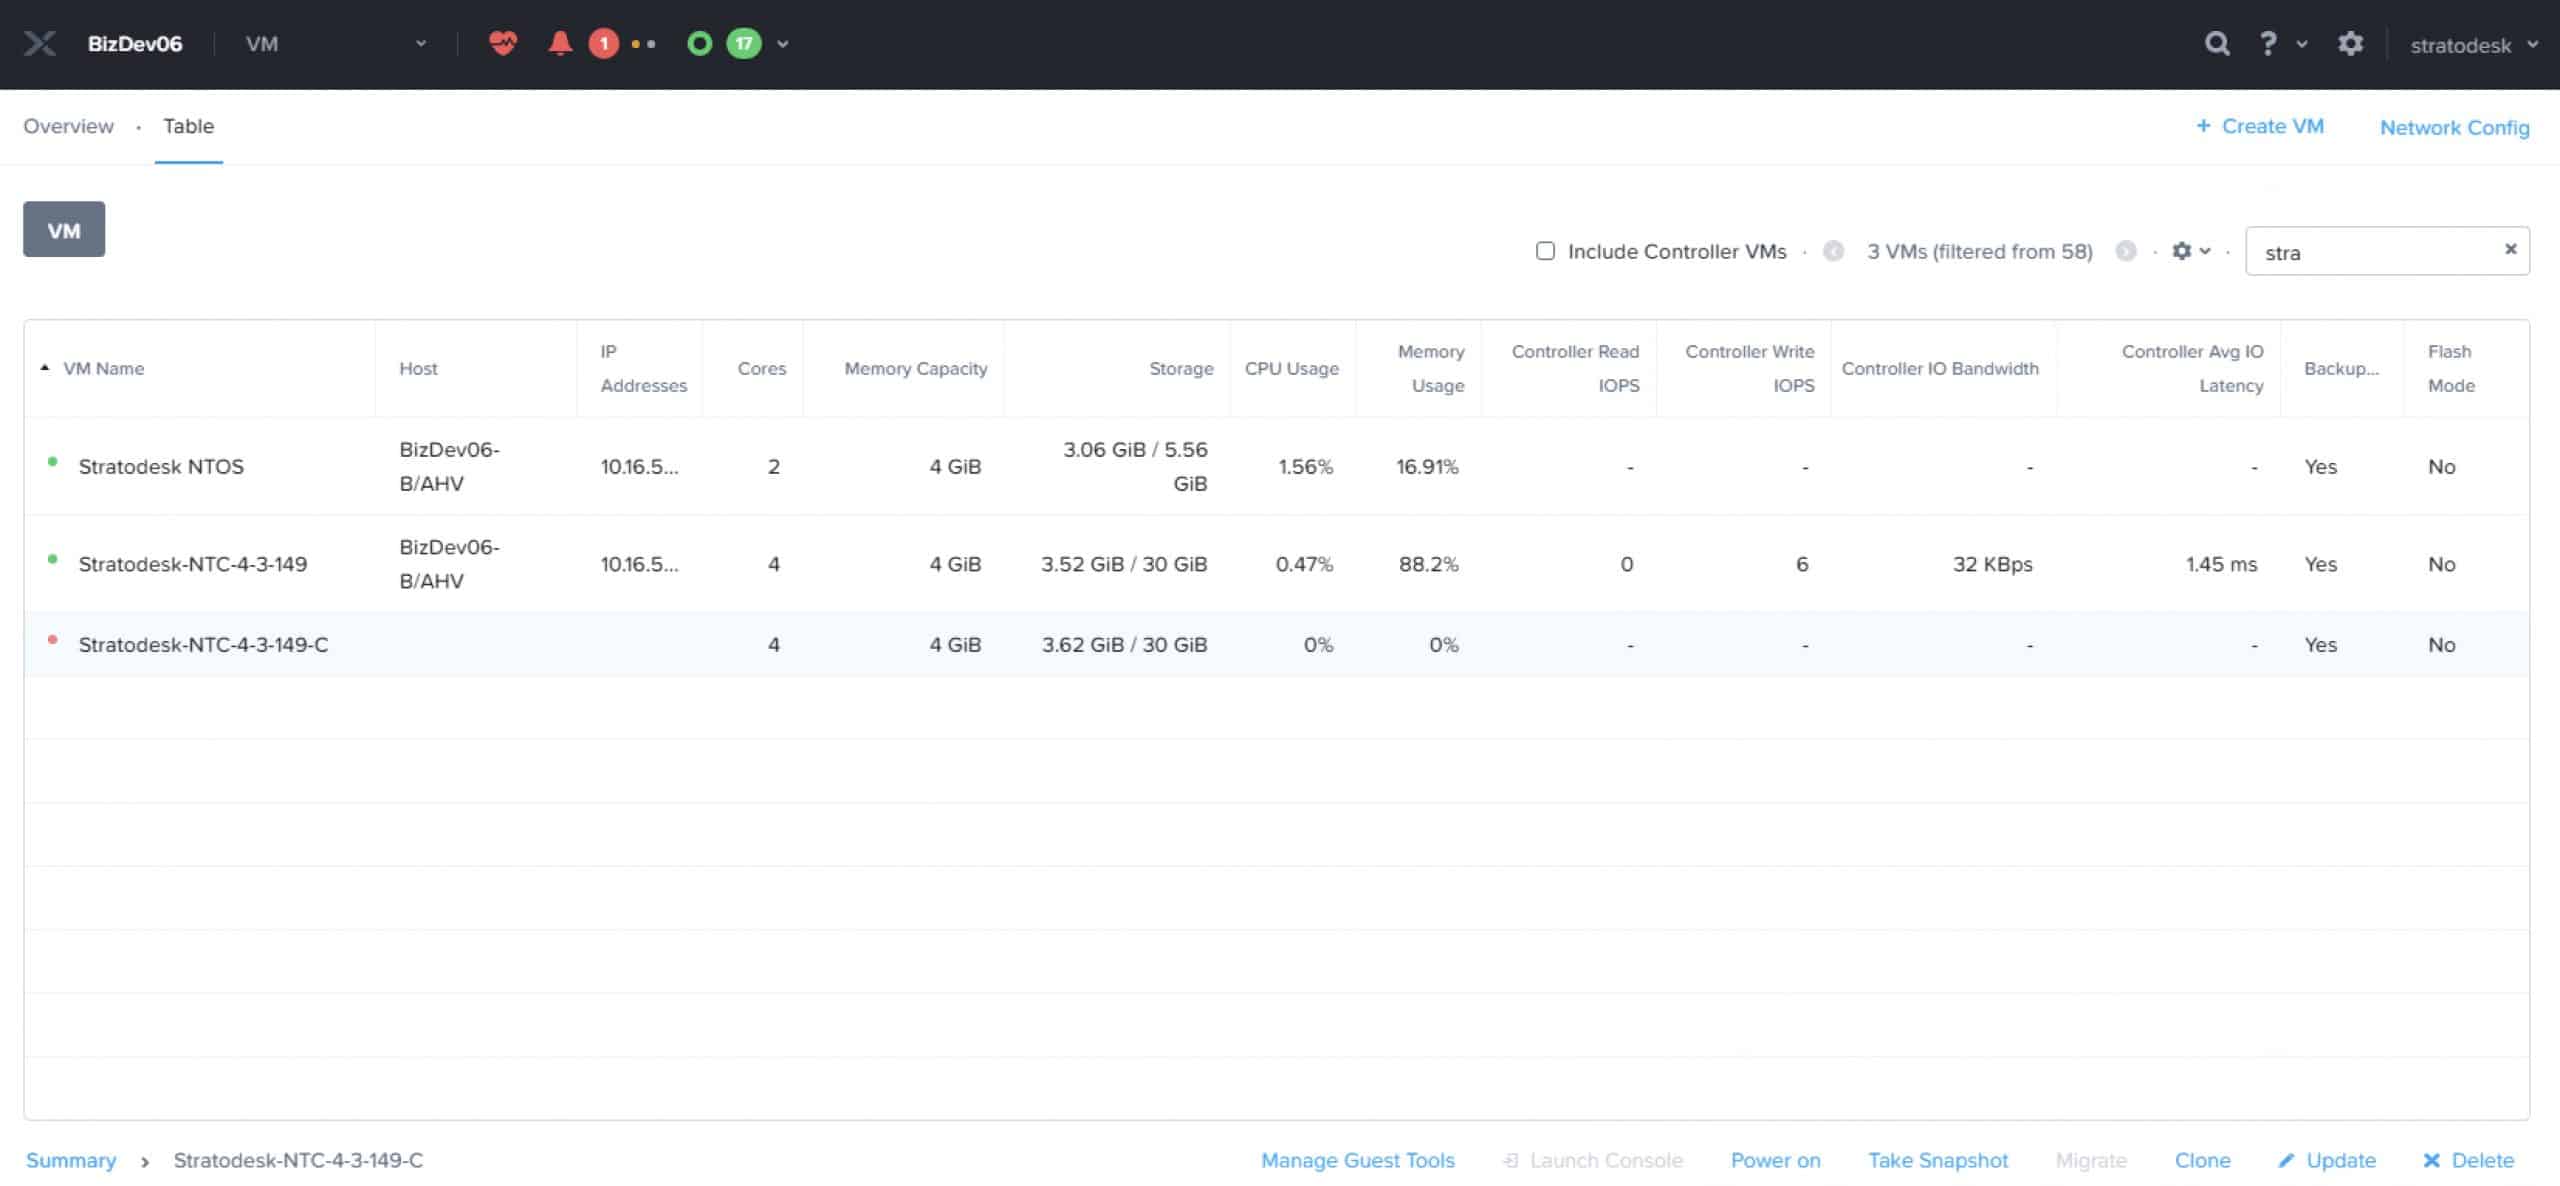
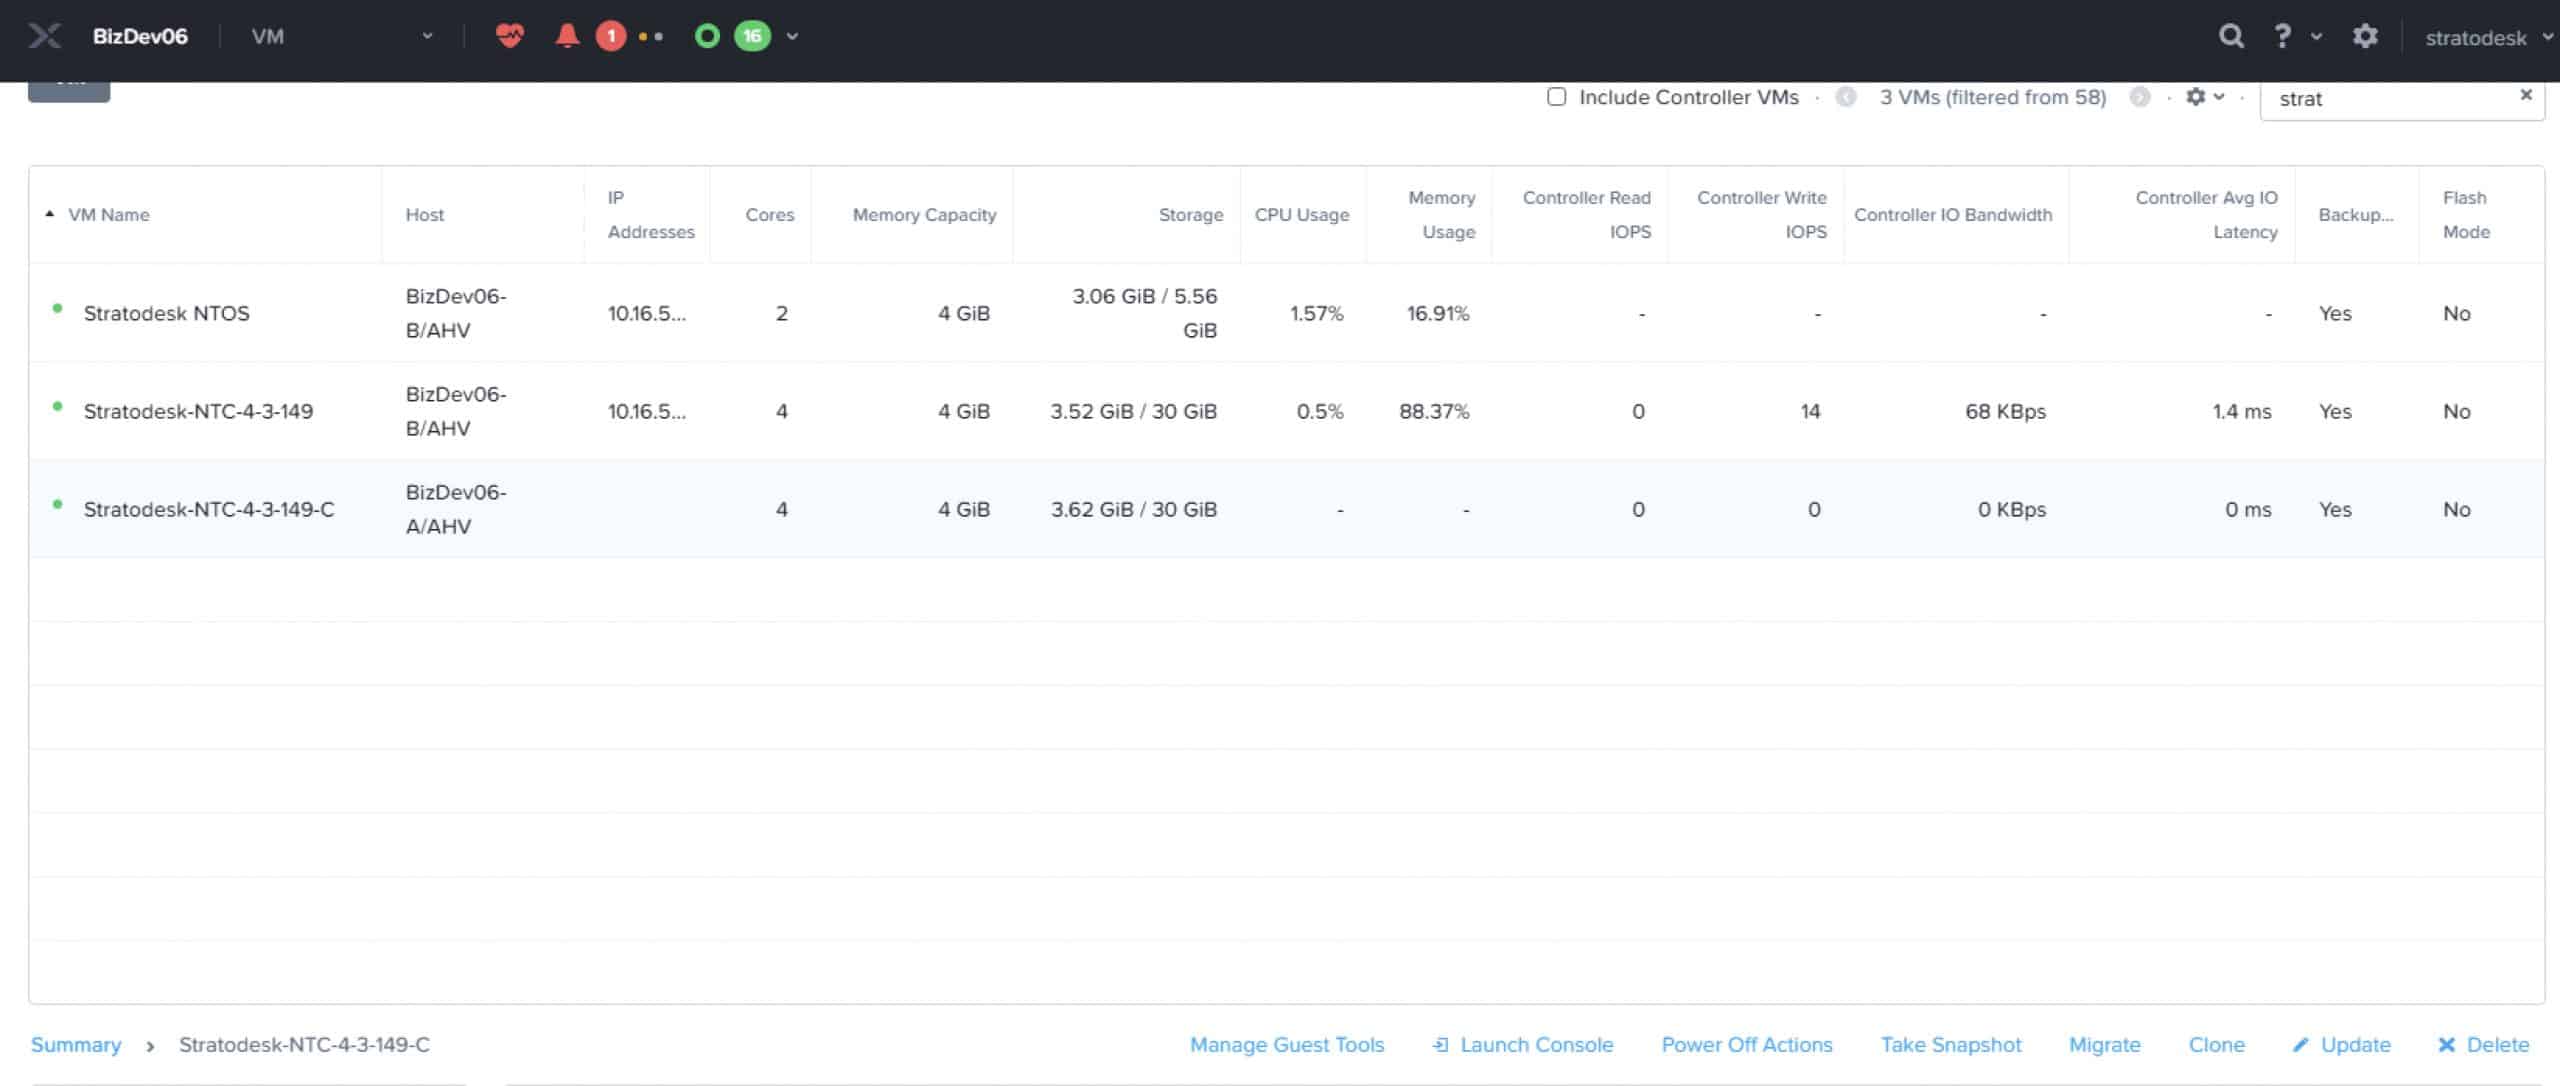
The next step is to power on the virtual machine, so to do this select the virtual machine (1), and the power of the virtual machine (2).

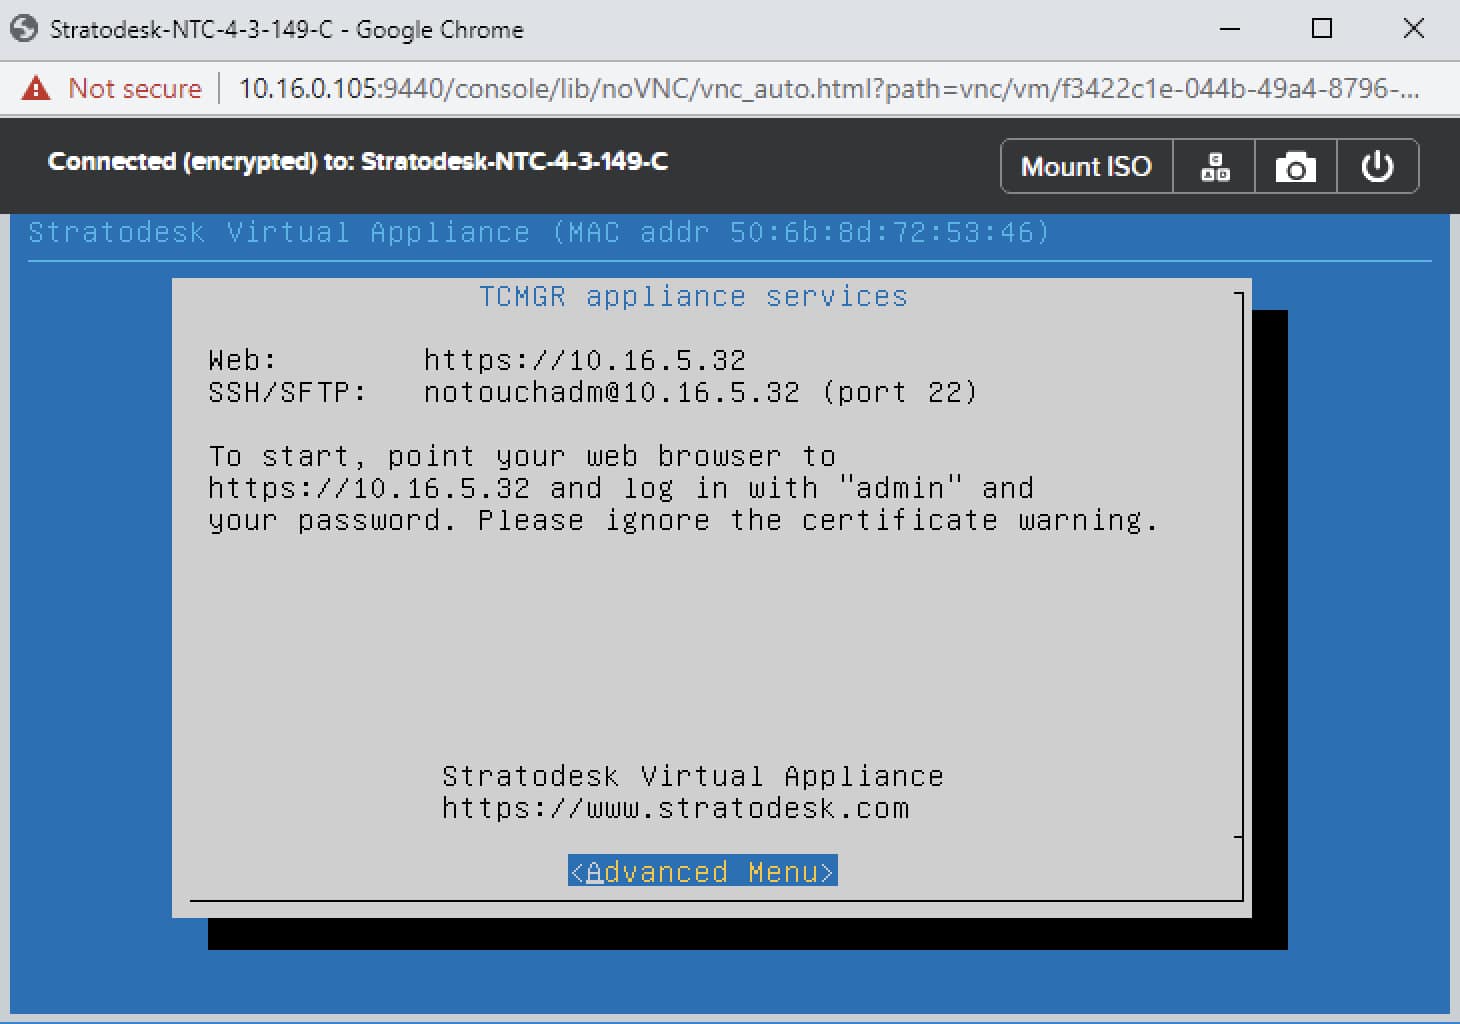
As the virtual appliance is powering on, you can then launch the console.

The console view allows you to directly interact with the virtual appliance and continue with its setup.

author avatar
Paul Craddock

How to Import Stratodesk Virtual Appliance into Nutanix AHV

Nutanix AHV

In this article from Stratodesk Sales Engineer, Paul Craddock, learn how to import Stratodesk Virtual Appliance into Nutanix AHV.

In this guide, walk through the entire process of importing Stratodesk NoTouch Center Virtual Appliance into Nutanix AHV using Prism. For the purpose of this test, we used Nutanix Acropolis Hypervisor (AHV) AOS-5.10.1 LTS.

Firstly, you will need to download the latest version of NoTouch Center vhd file for Hyper-V environments.

Please note that the image service supports raw, vhd, vmdk, iso, and qcow2 disk formats.

Uploading the Disk Image

  1. To start the process, we need to upload the vhd file via Image Configuration.
  2. On the next screen we need to specify the following: Image Name (the “annotation” field is optional). Image Type should be “disk”
  3. Choose the correct storage container
  4. Then choose “Upload a File” for the Image Source option.
  5. Click on “Choose File” and browse to your vhd or other format disk image
  6. Next click save.

7. After uploading the image, it will briefly show as ‘Inactive’ please be patient with this process as the image service is converting this for future use. Once this is complete it will show as ‘Active’ and should only take a couple of minutes even for large vhd’s.


Creating the Virtual Machine

  1. Next we need to create a virtual machine from the Image Service disk we created earlier.
  2. Name – Enter the name of the Virtual Machine
  3. Description – Optional, enter a description to identify the Virtual Machine
  4. vCPU(s) – Enter the number of vCPU’s that you’d like for the Virtual Machine. Typically the default setting here is 4vCPU.
  5. Number of Cores per vCPU – Typically this is set to “1”
  6. Memory – Enter the amount of RAM to assign to the Virtual Machine in GB format. Again typically this is set to 4GB for larger deployments you might want to consider increasing this.Nutanix AHV
  7. Next we need to add the vDisk, so select ‘Add New Disk’.
  8. In the ‘Add Disk’ screen, choose ‘Clone from Image Service’.
  9. Bus Type should be SCSI for most modern operating systems
  10. Choose the virtual appliance disk that you created earlier

Nutanix AHV

Don’t worry about the disk size as that will filled in automatically, then click on the ‘Add’ button.

Finally, under ‘Network Adapters (NIC)’, choose the button ‘Add New NIC’. On this screen, choose the correct VLAN and select it.

Nutanix AHV

The final step is the save the virtual machine.

Powering on the Virtual Appliance

The next step is to power on the virtual machine, so to do this select the virtual machine (1), and the power of the virtual machine (2).

As the virtual appliance is powering on, you can then launch the console.

The console view allows you to directly interact with the virtual appliance and continue with its setup.
author avatar
Paul Craddock
Back To Top